Friday, August 18, 2017

Putting the whole house on VPN through OpenSuse router

For years I've been running the internal network at the house through a PC running OpenSuse as the NAT/Masquerade router instead of a dedicated router box.   It lets me fiddle with things on my network more easily.  I suppose a WRT54 could do the same, but I don't.

A few months ago, we learned that the FCC was probably going to damage net-neutrality, and allow ISPs to do deep-packet-inspection.   My high speed vendor is among those most likely to be scummy, but there are no alternatives with the same speed.

The solution is to run a VPN through the high speed vendor to someplace that has good privacy guarantees, like, say sonic.net, which is one of the best.   I'd used them for DSL until the DSL was just too slow to tolerate.

Now, Sonic doesn't have a VPN account, but it does have an access account for $18/mo.  This is kind of pricey, but I don't really mind because I trust them.

The problems were

  1. When I connected with the openvpn software on the router, the inside hosts stopped getting NAT service through to the outside world.
  2. DNS was messed up
  3. It wasn't setup to autostart on boot.
Much digression later, the solutions were relatively simple.

1.   To make the NAT work, one can't configure OpenSuse through the guis.   You have to edit, as root, /etc/sysconfig/SuSEfirewall2 and add "tun0" (the interface openvpn makes and uses) to
FW_DEV_EXT="br0 eth0 tun0" 
FW_MASQ_DEV="br0 tun0"
2.    Change the DNS from the naughty ISP to something better, like google, editing /etc/resolv.conf

nameserver 8.8.8.8
nameserver 8.8.4.4
3.   Setup the boot automation stuff.


  • systemctl enable openvpn@<yourhostname>
  • copy your .ovpn file to /etc/openvpn/<yourhostname>.conf
  • change the auth-user-pass line in /etc/openvpn/<yourhostname>.conf to point to /etc/openvpn/creds.txt
  • edit creds.txt to include your user/pass
# cat /etc/openvpn/creds.txt
yourusername
yourpassword
#
  • protect your user/pass
# chmod 600 /etc/openvpn/creds.txt 
  • edit yourhostname.conf to add
script-security 2
up /etc/openvpn/up.sh
  • edit to create up.sh:
# cat /etc/openvpn/up.sh
#!/bin/bash
systemctl restart SuSEfirewall2
#
  • make up.sh executable
# chmod +x /etc/openvpn/up.sh

  •  fire it up with systemctl
# systemctl start openvpn@<yourhostname>

Now, when you boot, the system will automatically log in your openvpn connection, and restart the firewall to NAT your internal network though the tunnel instead of the naked interface.

This is essentially transparent to all the internal devices -- they don't have to login to the VPN at all.


Friday, November 11, 2016

Samsung TV out of the box with an upside down picture

Just got a cheap Samsung 28" TV from Fry's and powered it up,  Surprise! The display was upside down:


If this was a projector, there would be a menu option to flip, as if it were installed hanging from a ceiling, but I found nothing, and ended up calling Samsung support.   30 minutes later, with them having a very hard time getting them to understand "upside down", they told me to take it back to Fry's or schedule a service appointment.  Waiting for an appointment was absurd, and if I could fix it without taking it back life would be simpler.

Some Googling looking for Samsung TV service menu found a site with codes for different models. In this case, the magic was, turn the TV off, then "Menu - 1 - 8 - 2 - Power"


Which takes us to an upside down service menu.   If you don't get it when power comes on, you didn't hit the keys fast enough, so turn it off and try again.


With your head tilted enough to read, select the "Options" menu.


Then the "MRT Options"


And "HV Flip"


and use left-right arrow keys to turn it from whatever it is to the other way, in my case, "off" to "on".


The results are gratifyingly immediate.


Turn it off and back on, and it will stay that way until a "factory reset" is done.


I didn't find a page that cleanly addressed this, so here it is for anyone else.

What's actually wrong?   To see if it had an attitude sensor like a phone or tablet, I turned if off and flipped it physically upside down and turned it back on -- no difference.   I'd guess there is something that was plugged in backwards during assembly, an example of the very phenomenon that led to formulation of Murphy's Law - a unkeyed connector, or one that was mis-wired.

It might have helped talking to Support if I'd know the magic term in the service menu was "HV Flip".

Samsung UN28H4000BFXZA

Blood cost: none!


Saturday, January 2, 2016

Updating to Windows 10, resolving "NX" imcompatibility

Daughter's "lappytop" eee-pc needed to go to Windows 10 from the Windows-7 that it came with, but the compatibility check in the installed said the NX feature was missing.

The Atom 455 processor has is; there's nothing visible in the BIOS to flip it one way or the other. The answer comes from Tom's hardware poster slashgeek:

Fire up an elevated command prompt by typing "cmd" in Start, right clicking on "Command Prompt" and selecting Run as Administrator. Type the following command in:

"bcdedit.exe /set {current} nx AlwaysOn"

Restart your computer, and try installing Windows 10 again.

That did the trick.  Flashing a new BIOS (another exercise) didn't.

blood cost: none!


Saturday, December 5, 2015

Nuking Twitter "Moments" from Chrome

In which we show you how to make them vanish.

Twitter "moments" are an irksome replacement for the occasionaly interesting "Discover" feature that was removed.   It  was ignorable by most people until Twitter futzed with the layout and switched the "Notifications" and "Moments" buttons on the top of the page.   Now the self-absorbed people who are always looking for Notifications are getting tossed into Moments and becoming annoyed.

This code snippet shows up, from gloriously named computer security tweep J. Wolfgang Goerlich.  (I just had to write it out)

Which I, no javascript expert, recognize as something that will recognize moments in a web page and nuke it. An equally, I don't know what to do with it:
And the answer returns:
I understand what this means, but I've never done it, and it seemed like it would be helpful to go through it for other people.

Greasemonkey and Tampermonkey are things you add to your browser to make pages do what you want.  While not hard to use, not the sort of thing that non-technical people would normally use.  I'll show you below what to do.

For chrome, go to Tampermonkey in the Chrome Web Store and select the "Add to Chrome" in the top right:


It will ask if you really want to do this.   Click Add extension


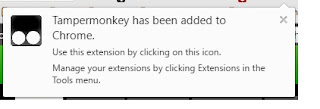
When it succeeds, it'll tell you it is happy, and invite you to click on it's icon to set up:


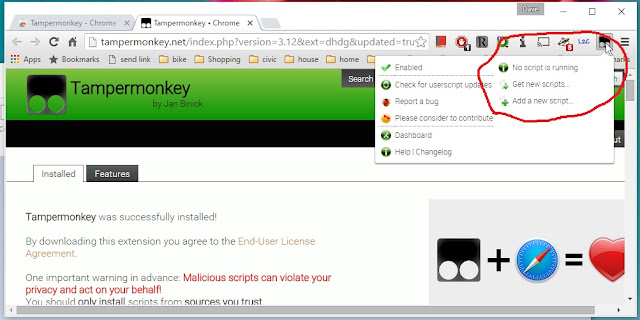
Click on the icon and then select Add a new script...


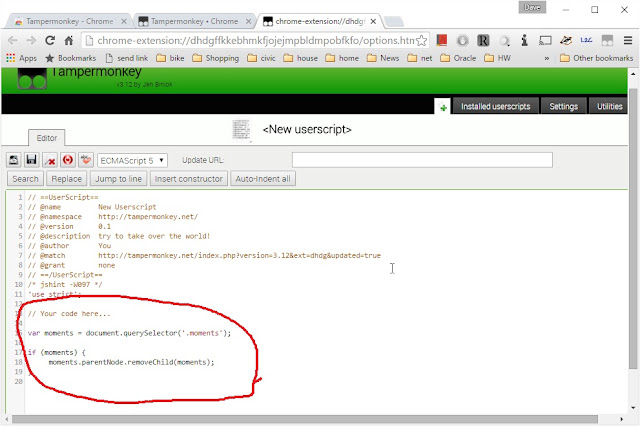
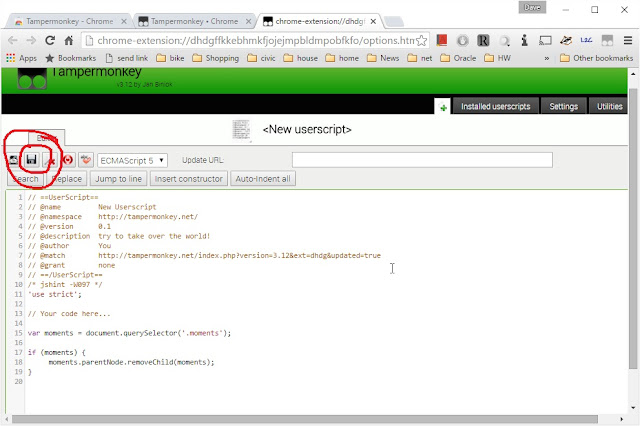
Then scroll to the bottom of the code window and paste in the snippet:


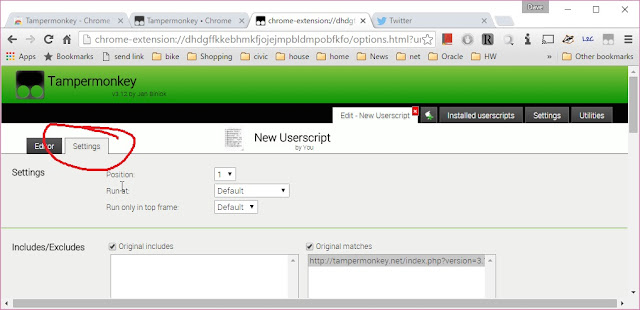
Then go to the settings tab:


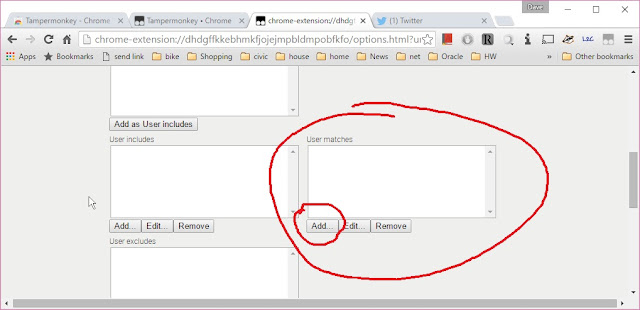
Scroll the page down to the "User matches" and click "Add"


Add the URL to match (everything in twitter.com, using the misspelled "hxxps":


The go back to the editor tab and click the save


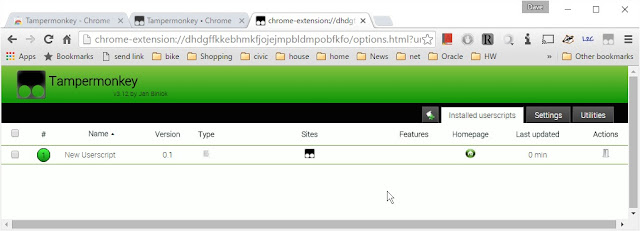
And you'll see it installed:


Then, go to twitter and you will be happy:


Blood cost:  zero!

Tuesday, January 6, 2015

Mounting a flat screen in a cathedral ceiling with beams

The kitchen has a bookcase over a desk. When we moved in, there was room for a 17" CRT television in one bay of the case, and for the cable/sat box. Watching TV required binoculars or standing right in front of it.

It was obviously necessary to get a big flat screen, except for a few problems:

  1. Absolutely cannot deprive the chef of space for cookbooks, so we can't just put the TV immovably in front of the bookcase.
  2. There's a cathedral ceiling and no wall to mount from. There are open beams across the open space.
  3. This is the dream kitchen, so whatever happens has to meet magazine-grade aesthetic standards well enough to make Martha Stewart happy, so no bailing wire and string.
  4. I'm a cheapskate who isn't going to pay someone else a bunch of money to come up with a solution.
The solution came from a mod to Quake 2.  Really.  It was set in the Structural Mechanics Division in Vicksburg Missisipi -- an explosives testing place.   David Hyde, an Army engineer, had modeled his workplace to battle the Strogg monsters. In one of the levels there is a hall  with a large overhead gantry crane, being a beam on rollers that could move up and down tracks on either side of a ledge on the wall.   You climb the ladder and move the crane while shooting monsters running around below. This is a common thing in industrial facilities, except for the shooting monsters part, and I spent enough time playing it that it's what popped into my mind,   Mod still available here and also here with description and screenshot


A steampunk-ish example, from Wikimedia:


Simplified drawing from here:


Not seeing it?


Span the beams with some kind of girder, from which we'll hang a pipe, and on the pipe we'll bolt on a VESA mount for the TV.    On top of the beams, put some kind of track, and put rollers  on the girder.  This way, the TV will pull out from in front of the books, and peace will reign in the galaxy.

Stability

How do we keep the girder from tipping over, wobbling front to back?   Let's look at the diagram again.   The red circle shows an upside-down T that does two things.   First, it gives a place to put multiple wheels to spread the load across more track.   Second, it gives leverage against tipping back and forth.   All the wheels are likely to stay on the track as long as the center of gravity of the load is between the front and back-most wheels.


With a TV on a pole in the original drawing, that presents something of a trick.   From the side, we start with:


You'll note than unless you make the T-part long, or have a very thin TV and mount, the TV is going to be forward in relation to the cross-girder, and this can have stability problems.  Guess how I found that out?   You can get a straight-tube ceiling mount from Monoprice  for $20, but I didn't know that at the time, and ended up not wanting that anyway.

What you see in some manufactured ceiling mounts is an offset bend in the downtube that keeps the center of gravity of the TV underneath the anchor point for the pole.   For example, this $155 ($300+ list!) ProMount:


If you're willing to spend for it, you can bolt that to your moving girder and be done.  Shop here, for example.  But I'm a cheapskate, so I decided to make my own tube out of universal Maker Material, thinwall EMT conduit.   

The right size conduit seems to be 1" which is $7.12 at Home Depot.   Smaller seems too flimsy, and larger is hard to bend.   Still, a bender for 1" is something I'll rarely have use for, and they are $83, which raises budget issues.  Options:  (a) pay it, and add to the tool collection;  (b) buy it, use it, and take it back for credit.   Feels funny, and costs another trip.  I went with (c) pull a stick, walk down the aisle, grab a tool and bend it in the store.    If I messed up, I'd buy a second one. The first one was close enough.   I did practice at home with the 1/2" ($3 a stick) first.

Finishing First

Aesthetics on this were important, so before final assembly, finish the wood pieces and paint the hardware.   For the pole, I used spray hammered paint, which looks right.   You might have to look a little to find it, but it looks better than flat, semi-gloss or glossy for this kind of thing.

Making a girder

We're not going to be lifting engines out of cars, so we don't need a massive girder for this.   The beams in the ceiling are 4x10's, and that's pretty heavy to lift up and a pricey hunk of wood.  You'd still have to mount the pole to it.  A hole all the way through would be awkward to drill, and I don't know if there are flanges (as used in the ProMount above) that I could make work with EMT. Instead, we'll take some 1x6 and make a mostly empty sandwich.   There's 12 pieces, cut out of two 8' boards, with some scrap.   Two long girders, two T-feet, nominally 3" being 1x6 ripped lengthwise, 4 end-fillers, and 4 center-section fillers and tube-clamps.   These each have one edge cut at an angle, shallow enough that when around the 1" conduit, the ends can't quite meet, more 35-40 degrees than 45.

Left-right placement of the pole-holder depends on the location of the beams and where you want the TV to align.   Ours ended up offset to the right so the tube would align with the center of the cabinet, which was not midway between the beams.

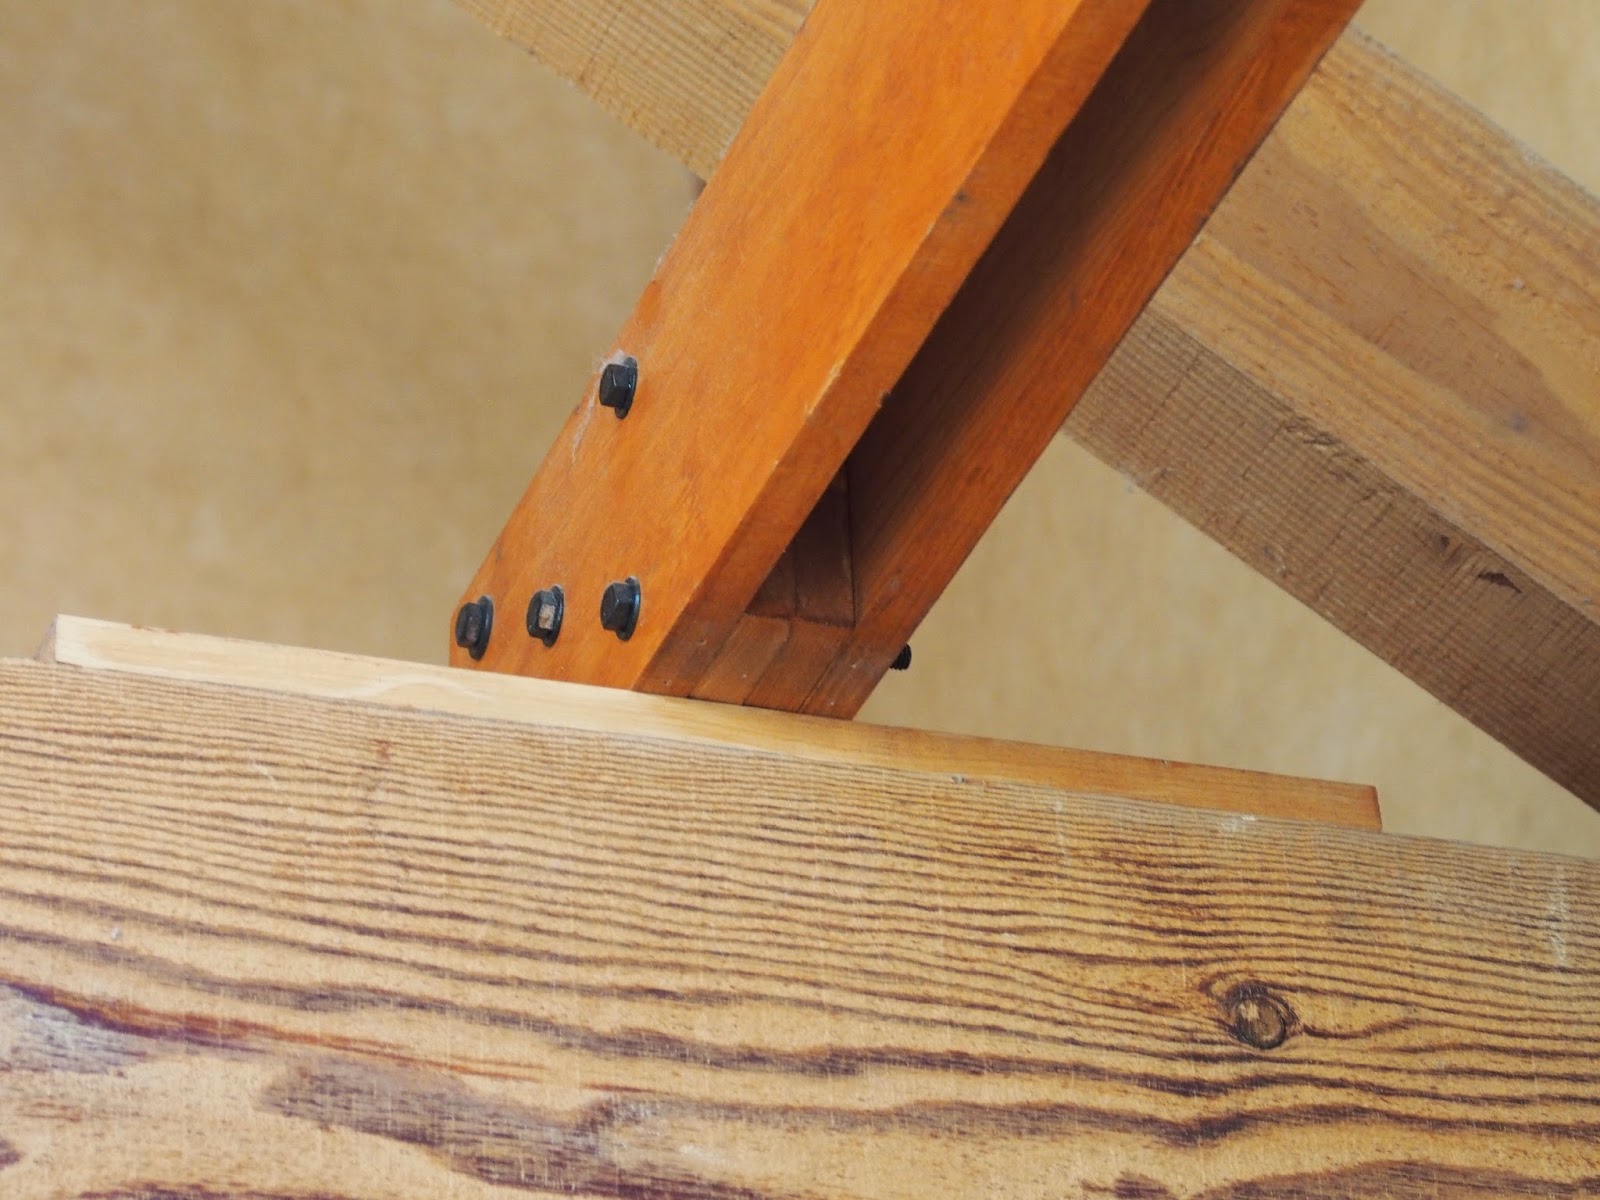
We have existing hardware in the ceiling beams to emulate:


Our sandwiches are held together with painted bolts,  5 on each side and 5 in the middle, in an X pattern.  Screws would work as well, and you could use a few to go into the pole to keep it from falling out the bottom.    The center bolt on mine goes right through the pole, so it isn't going anywhere.

You can use drywall screws to attach the T plate feel to the girder.   Make sure they are the right distance apart and square, or the tracking will be funny.


Rails and Wheels

You can go elegant or cheap.  I did cheap, and much later Kickstarted something that seemed more elegant, which I haven't used yet, described a little below.  The simple solution was to use some 1/4" round steel rod, $5 each. for the track and axles, and plastic or metal screen door wheels.

To mount the axles and wheels on the T-plate feet, I routed some 3/4 x 2 channels so the wheels could recess into the wood.   Cutoff a few inches of rod for axles. To keep the wheels from wandering side to side, fill space with washers. Originally I secured the axles to the foot using T25 cable stables.   This wasn't strong enough, and the axles tended to knock the stables out.  The final method is to make some partial channels for the axles to keep them from going front to back securing them with large topped sheet-metal screws.   This isn't appearance critical, since the wheels are on the bottom, covered by the T foot and on top of the beam.

The rail rods go one on each beam.  Start with one, put up the girder, then place the other to match the track width.   I first stapled the ends of the rods to the beams too, and that didn't hold up either. Sheet-metal screws worked better. 

The elegant alternative isn't much more expensive, and I may yet return to it for coolness at some point.  You can use $5-$15 aluminum V-slot rail,  $6 wheel kits and $9 wheel mounting plates.   The rail is a wash on cost (except for shipping), and it is $15 a wheel rather than $3-$6 for the screen door stuff.   This will also sit higher than the rod and screen door wheels.


TV Mount to Pole

Doesn't need to be fancy, the simpler the better.  Can't find the one I used, but this one from Walmart looks close enough, and is $13.   Two holes through the pole and a couple of bolts at the top and bottom of the back bracket and you're done.


When this backs up to the wall, the bolts sticking out the pole from here are going to hit the wall or the cabinet.   I suggest using acorn or cap nuts (plastic if you can find them) to cover the sharp metal threads and keep them from gouging the points of impact.


Cables

You want to get the cables to the display neatly.   I used corrugated wiring loom and zip-tied it to the pole, which isn't awful.   With a larger  pole, say 1-1/2, you could run cables internally, but hard to bend and you'd have to use a straight pole.   At that point, you might as well use the $20 one from Monoprice.   If you want bent tube and internal cables, you'll have to go commercial, I think.


To keep the bundle cable from getting all over the place when the set is extended from the cabinet, and pushed back, I used a $4 screen door spring attached to the beam and a loop in the cable for retraction.  Even if you have internal routing, you'll have a slack loop from the girder to the cabinet.

To get long cables from wherever the electronics are through the loom to the TV, go no further than Monoprice.   High priced cables for digital signals is a working definition for rip-off.


Results 

All told, you can do this for less than $100, and your domestic relations over the TV in the kitchen will be tranquilo, especially if you get the right video to play when there's cooking to be done.


Parts list


Part qty description cost


1" EMT Conduit, 10' 1 downtube $7
1x6 boards, quality to taste 2 girders, fillers, t plates $14
4" bolts 15 girder assembly $5
washers 15 girder assembly $1.50
lock washers 15 girder assembly $1.00
nuts 15 girder assembly $1.50
1/4" steel rods 2 rails and axles $10
screen door wheels 4 rollers $12
washers 24 spacers on axles for wheels $1.00
drywall screws some mount t plates to girders you have them
vesa TV mount 1 specialty part. $13
2" bolt 2 vesa to pole -- check length $1
washer 2 vesa to pole $1.00
bolts 2 vesa to pole $1.00
cap nuts 2 vesa to pole $1.00
spray paint 1 pole, bolts, washers, nuts $7.00
stain 1 wood $7.00
cable loom 1
$7.00
zip ties 5
you have them
Total

$90 or so

Blood Cost

Fingers, metal shards from drilling the conduit.  Bumps on the head from repeatedly climbing ladder and hitting the beam.

Monday, January 5, 2015

ZModo SPoE IP NVR ZP-NE14-S, not exactly secure

For various reasons I found myself in need of some outdoor surveillance recording; places too far for reliable wifi, and no power, but where I could run gel-filled cat6 back to a place with power.   That got me looking at power-over-ethernet systems, and I ended up with a Zmodo 4-channel system.  I had some spare drives lying around, so got the naked version.
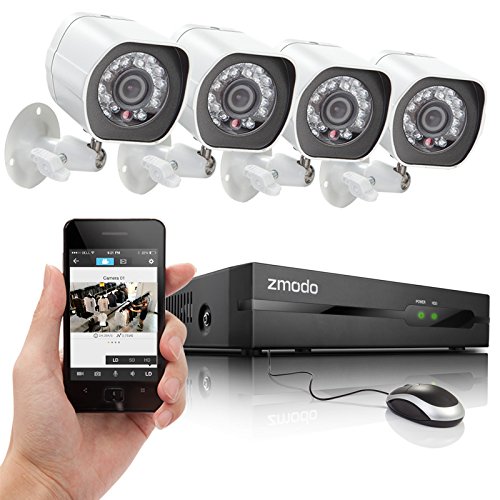


It's cheap, it works well enough, I guess.   The software is awkward on first encounter, but I'm sure I'll figure it out eventually.   Discovery that works in the host application doesn't work from a phone, so you need to enter things in by hand.   Awkward, but workable.

It is not very secure, which means it is not secure.  So I probably won't punch holes in my firewalls to allow remote access.  And it should be on it's own network without access to everything else.

Here's a few things that just hit you in the face.
  1. All communication is using unencrypted plain-old HTTP, including the administrative login to both the recorder and the cameras.   This means that anyone with sniff-access to the network can plunder the admin passwords with little difficulty.
  2. The ZViewer application installs in such a way that on current versions of Windows, the UAC system asks you for permission to run as an Administrator on every startup.   There seems no reason to me why this remote-video watching application should have Administrative permissions on my Windows computer.
  3. The support is what you expect from a cheap consumer device.
Being the sort that I am, I tried to ask about these with their support.    The first answer I got back was marginally informative.   (1) No SSL, sorry.   "You can keep your network secure by changing your username and passwords from defaults and not giving out the information."  (2) It's not us, it's Microsoft, "The program itself is not asking you to run it in admin, windows is."

My reply to that was admittedly pointed:
If Windows is asking, it is because the zviewer installation process is requiring it to ask.   Why does your software install requiring admin permissions on the windows host?  This should not be necessary, I don't think 
I understand the TLS/SSL thing.   Your suggestion to change passwords and not tell anyone is quaint, and we could not get away with that in our software.  I now understand now your product is fundamentally insecure and requires a secure network.
To which I got 


Alright,
Have a great day.
Which doesn't exactly answer the question about admin privilege needed to run the viewer.  I've sent a followup about that, we'll see.

I'm sure I've been marked PITA in their support database.   I'd say they are defensive, with much to be defensive about.


Wednesday, December 31, 2014

Vague Promises

I'm sort of a Maker, though I tend towards the "breaker" side of the skill set.  I'm going to try to record interesting parts of various stupid projects I find myself tangled into here.  Maybe you can avoid hurting yourself or others!

(It's a rare project that doesn't involve blood at some point.)

A few things I'd like to cover,

  • Mounting a flat screen TV in a a cathedral ceiling.
  • Running light strings on cables over a patio and around a pool.  Fun with poles, guy wires, and cable swaging.   (tl;dw $20 home depot swager,  riggingwarehouse.com cable and fittings.)
  • Unfun with sump pumps in exterior locations.  (tl;dw, don't live on the downslope or in a swale; have a gravity-fed path to the street)
  • Scanning a lifetime of slides, negatives and print ephemera.  Nikon Coolscan 5000ED, Vuescan, Digikam, Picasa, Umax 1200XL/scsi on Windows 8.1 64. (tl;dw Someday, the kids will thank your memory.  Maybe.)
  • Digitizing vinyl records (tl;dw you will never get these hours back)
  • Recycling VHS tape storage units into a bike rack.  (tl;dw, a decade late for this)
  • Hanging bikes under an open garage door with some conduit and an old mattress  (tl;dw hang two pieces of conduit under open garage door with wire cable or rope anchored into ceiling.   Place wood frame from scavenged mattress on top of conduit.   Screw bike hooks into wood frame.  Profit.)
  • Some notes about ethernet, wifi, and audio/video wiring in the home. (tl;dw: Keystone jacks for everything, run more than you think you need).
  • Sprinkler maintenance and remotable controllers.  (tl;dw:  use one system, e.g.; Toro, always use 3/4 sch 40, never 1/2"; use 5/8 drip lines, never 1/4", don't get Irritrol PC-Control).  Highly recommend Jess Stryker's Irrigation Tutorials.
  • Why you should live in a condo or apartment instead of owning property you live in.  (tl;dr, watch  "Mr. Blandings Builds his Dreamhouse").